We often see homeowners get overwhelmed by the technical details of property upgrades. Knowing exactly what happens on the day makes the entire process stress-free.
This what to expect during a swing arm autogate installation: complete guide breaks down everything you need to know.
Our team has handled hundreds of swing arm autogate installation projects across the Klang Valley. Proper preparation prevents unexpected delays and ensures a smoother setup on your driveway. Let us examine the step-by-step process, review the hardware options, and outline the maintenance required to protect your investment.
Step 1: Site Assessment (Before Installation Day)
Our process begins with a thorough site visit long before the tools come out. A proper assessment ensures your specific property layout matches the hardware requirements.
Gate Condition
We check your existing gate for structural integrity, weight, and suitability for motorisation. A standard Malaysian terrace house typically features a gate spanning 16 to 20 feet in width.
The gate must be straight, properly hinged, and not sagging. Your metal frame needs to handle the torque of the motors.
If the gate is bent, rusted through, or poorly welded, repairing or replacing it before motorisation is highly recommended.
Pillar Assessment
Our technicians mount the swing arm motors directly onto your gate pillars. Solid concrete pillars offer the best foundation for a lasting hold.
- Pillar width: A minimum width of 15cm is necessary for the arm bracket mounting.
- Pillar material: Hollow or decorative brick pillars usually require internal steel reinforcement.
- Pillar height: The mechanical arm must align perfectly with the gate’s horizontal middle rail.
Clearance Measurement
We measure the exact driveway clearance to guarantee the gate swings open fully without obstruction. A typical 20-foot opening requires at least 10 feet of inward driveway space for each panel.
- Inward swing arc: The space required inside the car porch.
- Ground clearance: The bottom edge must clear the driveway slope across the entire arc.
- Obstruction check: Drains, steps, plant pots, or parked vehicles must remain clear of the path.
Electrical Access
Our electricians inspect the distance from your nearest power point to the motor location. The system requires a standard 240V supply routed to a weatherproof 13A power outlet.
This outlet should sit within 5 to 10 metres of the gate pillars. Adding concealed wiring work into the quotation is a standard solution if an outlet is missing.
Step 2: Quotation and Motor Selection
We prepare a detailed quotation immediately after completing the physical assessment. The proposal covers the motor unit, three remote controls, installation labour, and warranty terms.
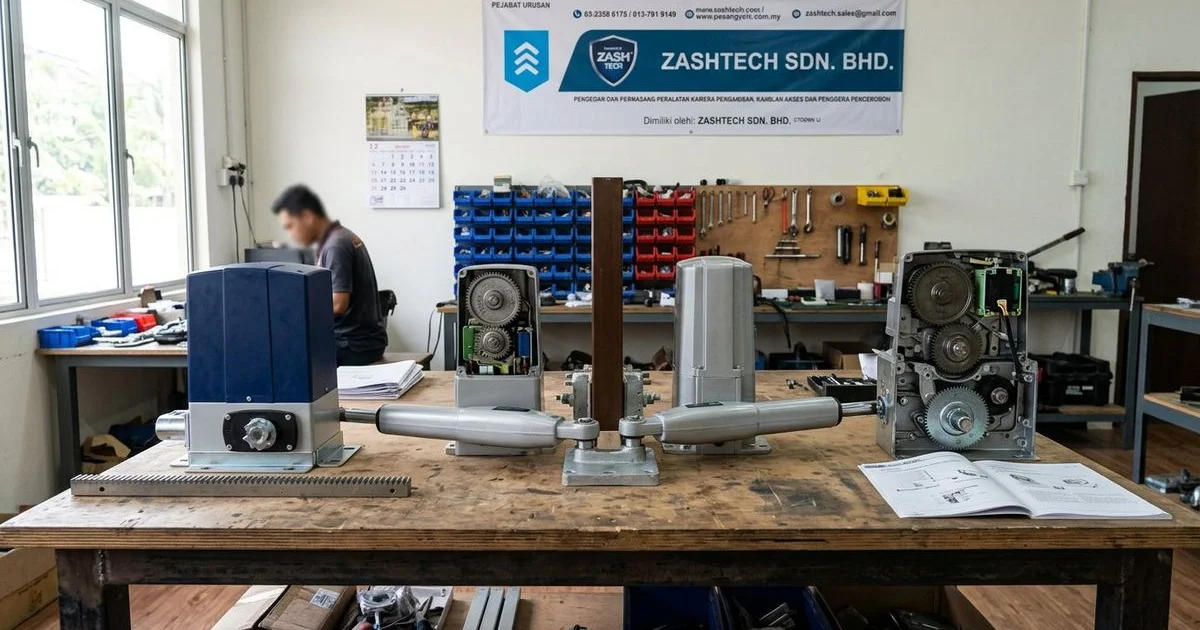
Selecting the right hardware depends heavily on your specific gate weight and design. Two of the most reliable motor brands for residential properties in Malaysia are DCMoto and OAE.
These DC-powered systems include battery backup capabilities for power outages.
Comparing Popular Motor Options
Our clients frequently choose between the DCMoto GFM925W and the OAE 333A models. The DCMoto unit uses a hybrid power system that cuts electricity consumption by up to 95 percent during standby.
The OAE 333A provides exceptional durability with its heavy-duty stainless steel arm.
| Feature | DCMoto GFM925W | OAE 333A |
|---|---|---|
| Best For | Standard residential gates | Heavy or wide metal gates |
| Material | Weather-resistant polymer and metal | Heavy-duty stainless steel |
| Max Weight | Designed for standard loads | Up to 400kg per wing |
| Standby Power | Ultra-low hybrid design | Standard DC consumption |
| Key Advantage | Energy efficient and quiet | High torque and durability |
We guide you through these options to find the perfect match for your home. Your final quote will also detail any necessary pillar reinforcement or wiring works.
What to Expect During a Swing Arm Autogate Installation: Complete Guide to the Big Day
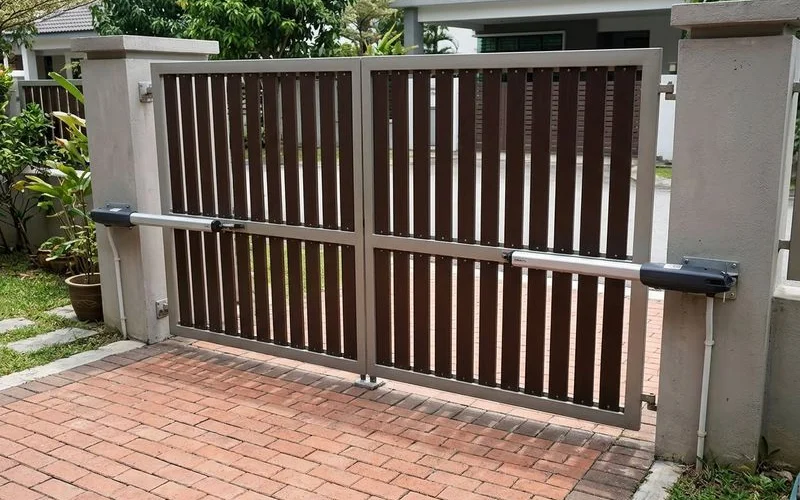
Our standard installation for a double-leaf swing gate takes between three and five hours. A structured approach ensures every component functions flawlessly.
3A. Preparation (30 minutes)
We arrive with all the necessary equipment, materials, and protective gear. Protecting your property is a top priority.
- Confirm the precise motor position with the homeowner.
- Lay out protective canvas covers to prevent driveway scratches.
- Prepare the welding set, heavy-duty hammer drill, and hand tools.
- Test the control board and motor units prior to mounting.
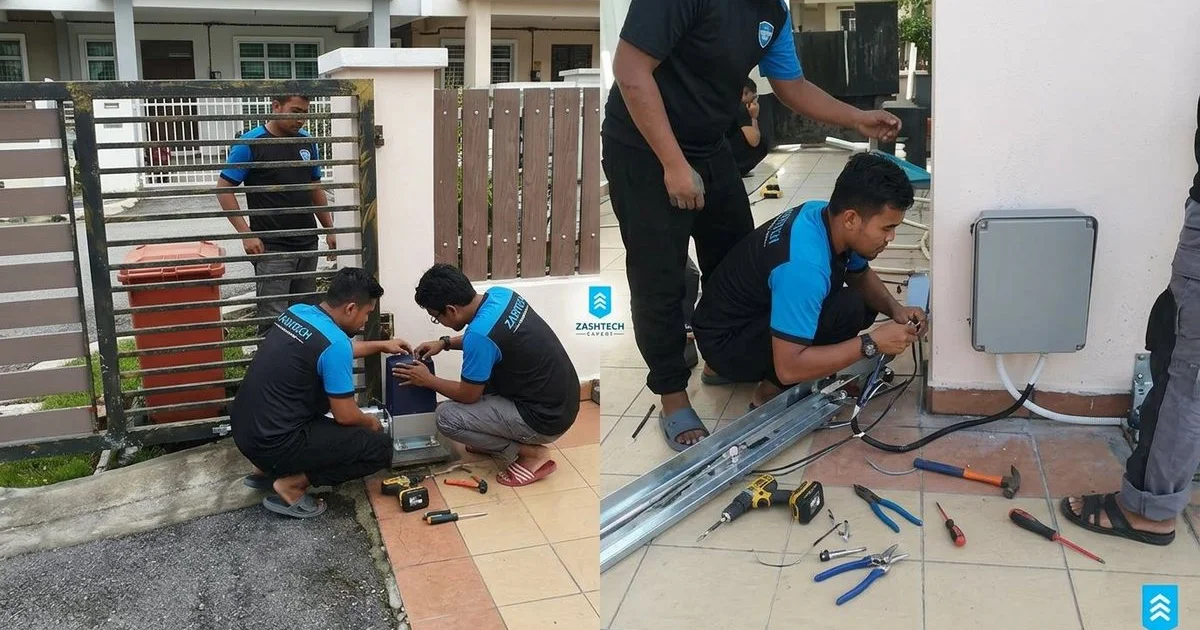
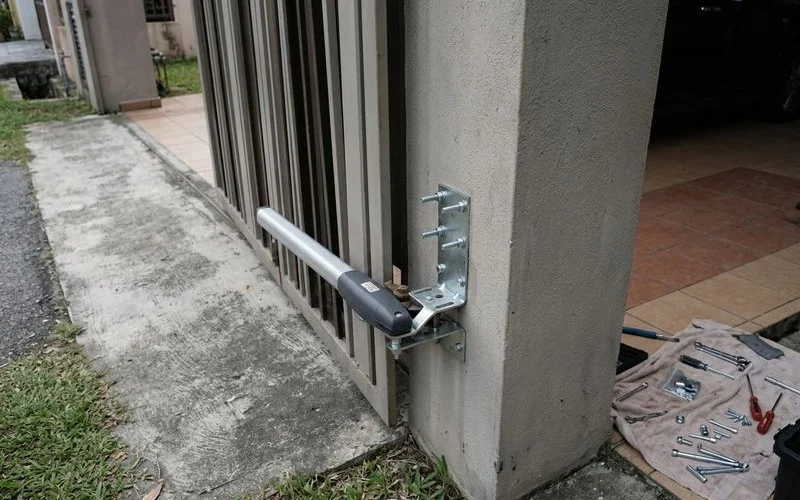
3B. Bracket Mounting (45-60 minutes)
Our technicians consider this the most critical phase of the entire job. The pivot brackets require exact alignment to prevent the motors from binding over time.
For solid concrete pillars, heavy-duty M10 or M12 wall anchor bolts provide a secure grip.
- Positioning: The steel bracket is marked for precise height and angle.
- Securing: Brackets are welded to metal posts or bolted deep into concrete.
- Level check: A spirit level confirms the alignment is perfectly straight.
- Replication: The exact process is mirrored on the opposite pillar.
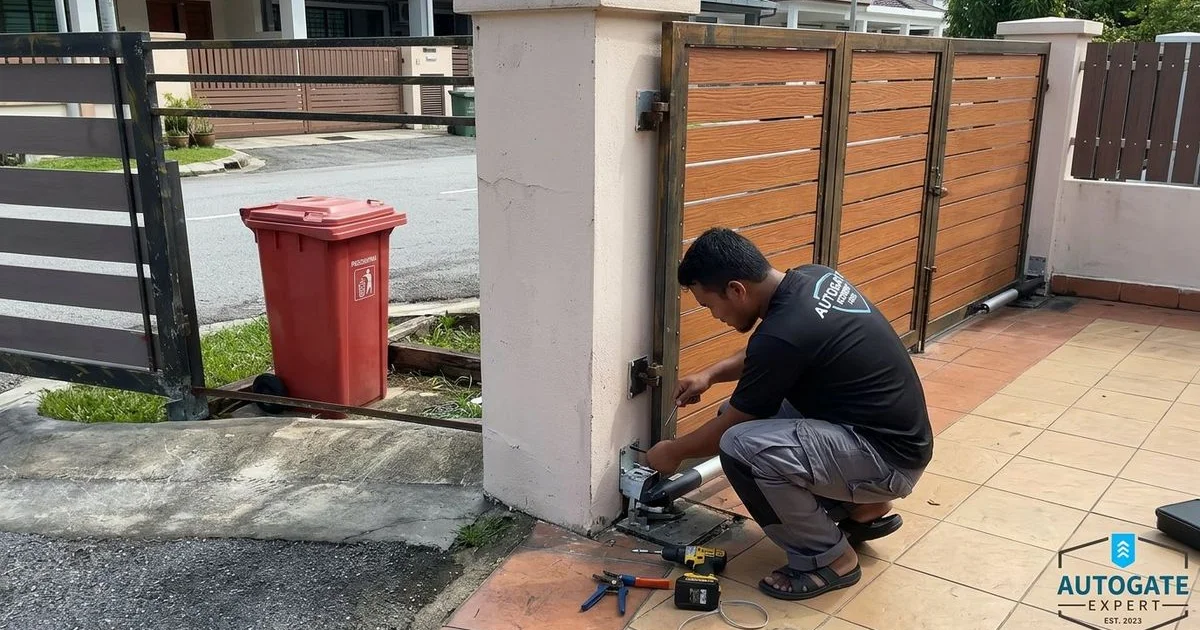
3C. Motor Arm Installation (30-45 minutes)
We connect the actual swing arms once the base brackets are fully secured. Proper geometry here dictates how smoothly the gate will operate.
- Arm attachment: The motor hinges onto the pillar bracket pivot point.
- Gate connection: The front end attaches securely to the gate panel.
- Swing test: Manual pushing reveals any mechanical interference.
- Adjustment: Technicians fine-tune the extension length for perfect closure.
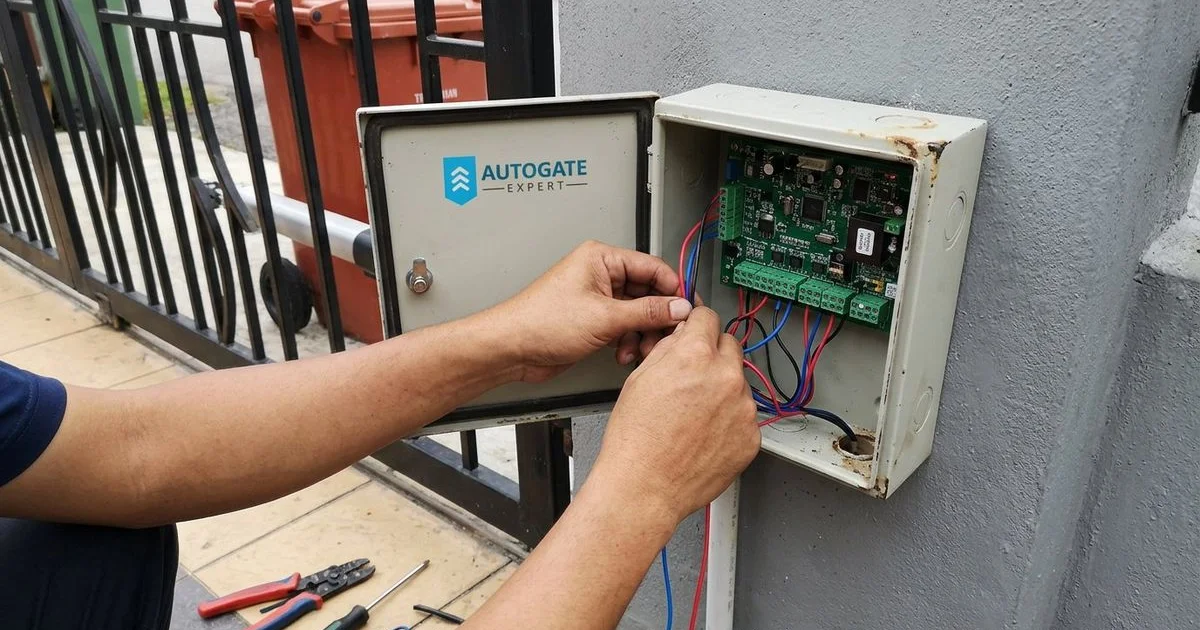
3D. Control Panel and Wiring (30-45 minutes)
Our electricians install the main control box at a safe height. This weatherproof casing houses the electronic brain of the entire setup.
- Box mounting: Secured against the wall or pillar, protected from direct rain.
- Motor wiring: Sirim-certified 3-core PVC cables run to each motor.
- Transformer: A step-down unit connects safely to the main power supply.
- Receiver: The radio frequency module is linked for remote access.
- Battery connection: The 12V backup battery slots into the main casing.
3E. Limit Switch Calibration (20-30 minutes)
We program the internal limit switches to tell the system exactly when to stop. Proper calibration prevents the motors from over-extending and causing structural damage.
- Open limit: Stops the panel at a 90 to 110-degree angle.
- Close limit: Ensures the two panels meet perfectly in the center.
- Auto-close timer: A 15 to 30-second closing delay is set if requested.
- Obstacle detection: Sensitivity is adjusted to reverse upon hitting an object.
3F. Testing (20-30 minutes)
Our final step involves rigorous quality control checks. Running the system repeatedly highlights any hidden issues before handover.
- Cycle testing: The gates complete at least 10 full open and close motions.
- Remote range: Clickers are tested from various distances down the street.
- Safety verify: Obstacle sensors are physically blocked to test the auto-reverse.
- Power cut test: The main breaker is switched off to test the battery backup.
- Acoustic check: Any abnormal grinding noises are immediately addressed.
Step 4: User Training
We dedicate time at the end of the appointment to walk you through daily operations. Understanding your new system prevents accidental damage and unnecessary service calls.
A standard GP 12V 7Ah sealed lead-acid battery powers the backup system. This reliable unit typically lasts up to three years on standby or provides enough power for multiple cycles during a neighborhood blackout.
Here is what you will learn during the handover:
- Remote control operation: The specific buttons for opening, closing, and stopping.
- Manual release: Using the override key to unlock the arms during an emergency.
- Auto-close feature: Activating or pausing the automatic timer function.
- Safety precautions: Keeping children, pets, and vehicles clear of the moving panels.
- Battery maintenance: Recognizing the warning signs of a depleting backup battery.
- Basic troubleshooting: Resetting the main breaker if the system becomes unresponsive.
We will register your product warranty right on the spot. A direct support contact number is provided for any future inquiries.
After Installation: What to Watch For
Our aftercare support begins the moment the installation finishes. The mechanical components require a short break-in period to settle into their permanent positions.
DC autogate motors operate much more quietly than older AC-powered sliding gates. A soft, consistent electrical hum is entirely normal during operation.
During the first two weeks, please monitor the following details:
- Unusual noises: Grinding, clicking, or loud popping sounds indicate a mechanical alignment issue.
- Consistent operation: Both panels should swing at the exact same speed.
- Full closure: The center locking point should align perfectly without a visible gap.
- Remote response: The receiver should pick up your signal from your normal parking spot.
We encourage clients to reach out immediately if anything seems off. Catching a minor alignment issue early prevents expensive wear and tear on the gearbox and avoids a full autogate repair service call.
Maintenance After Installation
We strongly advise following a simple maintenance routine to extend the lifespan of your motors. A little preventative care keeps the system running silently for years.
Many homeowners make the mistake of using standard WD-40 on their gate hinges. Standard penetrating oils attract dust and grit, which eventually forms a thick, abrasive paste.
Using a dedicated silicone spray is the correct approach for all moving metal parts.
Recommended Upkeep Schedule
- Monthly inspection: Look closely for loose anchor bolts and listen for uneven motor strain.
- Quarterly lubrication: Apply a high-quality silicone spray to the arm pivot points and main gate hinges.
- Annual servicing: Book a professional inspection for gear greasing, electrical testing, and limit switch recalibration.
- Pest control: Check the main control box occasionally to ensure ants or geckos have not nested on the warm circuit board.
Ready to Install?
Our team is ready to evaluate your property whenever you are. Upgrading your home security starts with a professional, obligation-free site assessment.
If you are looking for a reliable partner after reading this what to expect during a swing arm autogate installation: complete guide, the next step is a free site assessment. You can easily schedule a visit to evaluate your gate, pillars, and driveway layout. WhatsApp us at 018-298 9389 to book an appointment today.
We will provide a transparent quotation with zero hidden charges based on your specific requirements.
Related Service: Swing Arm Autogate Installation

Written by
Mohamad Zakiy Mohd Isa
Sales Director
Certified Security Systems Consultant
Sales Director specialising in autogate and security system consultations.